
Purchasing a Web Hosting Plan
The first step to sign up for a web hosting plan is to head over to the web hosting sign up page (https://get.515hosting.com).
This page will provide a variety of initial options for setting up your account as well as a payment portal. Once your account is setup, you’ll be able to manage all of your services and purchases through your dashboard, including adding additional features or upgrades to the account.
Let’s take it step by step to get your account started.
Step 1
Select the “Hosting Plans” Tab
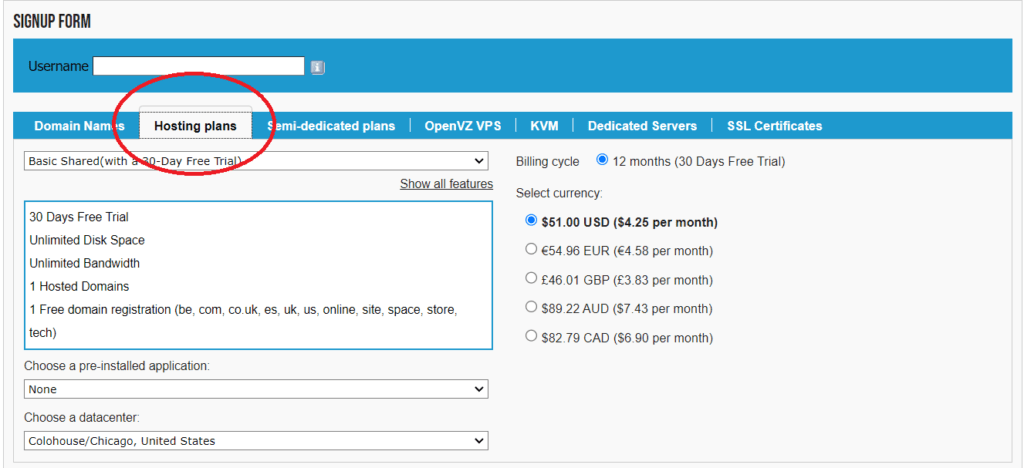
This will bring you over the the “shared hosting” plans.
These plans tend to work best for entry level websites, bloggers, and small businesses. If you need more server resources or are running a larger enterprise, it’s recommended to check out the other tabs for VPS and dedicated server options.
Step 2
CHOOSE A USERNAME
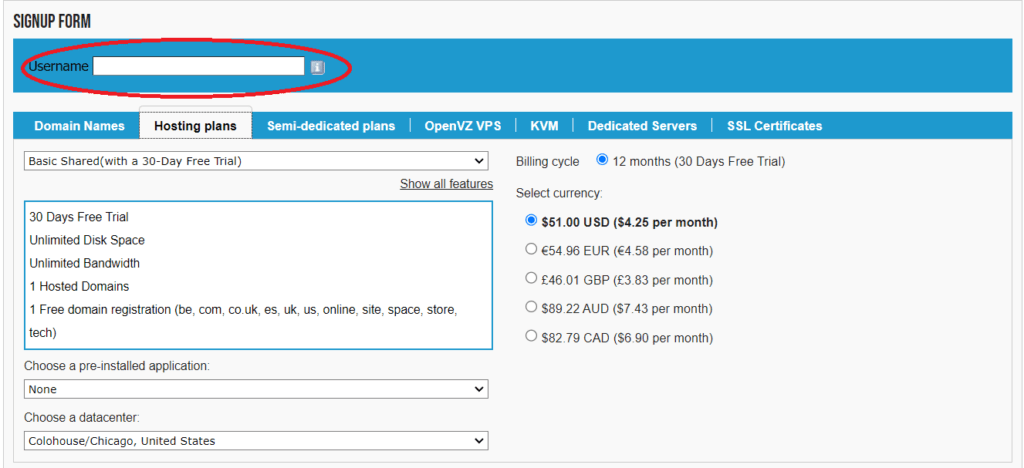
Your username will be your unique identifier for your account. You will use your username, along with a password chosen in a later step to login to your account and manage your hosting plan.
Step 3
Choose a Hosting Package
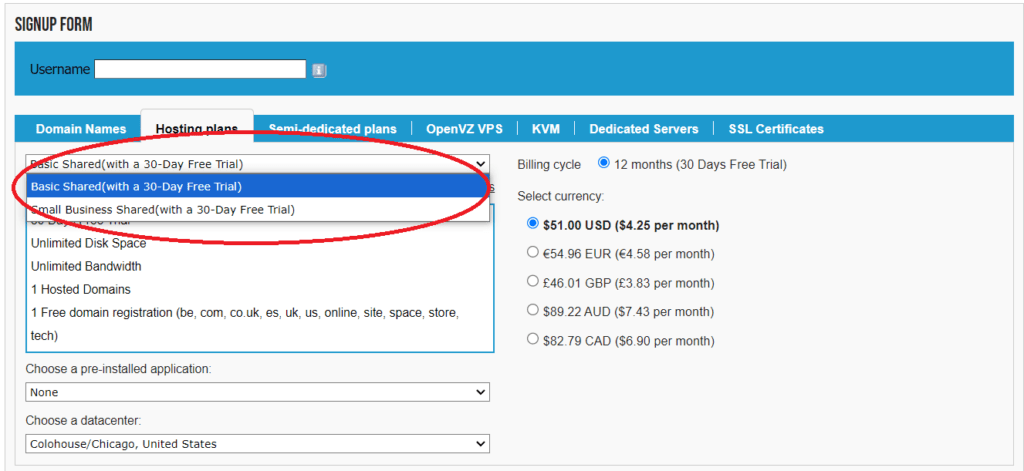
Each hosting plan includes a number of basic features, but opting to choose to an upgraded package provides a variety of additional options including more domain names, CPU resources, and more. Be sure to review each of the options by clicking “Show All Features” directly below the drop down to see how each plan compares.
Next, choose a billing cycle and currency to match your preferences.
Step 4
SELECT A DATA CENTER
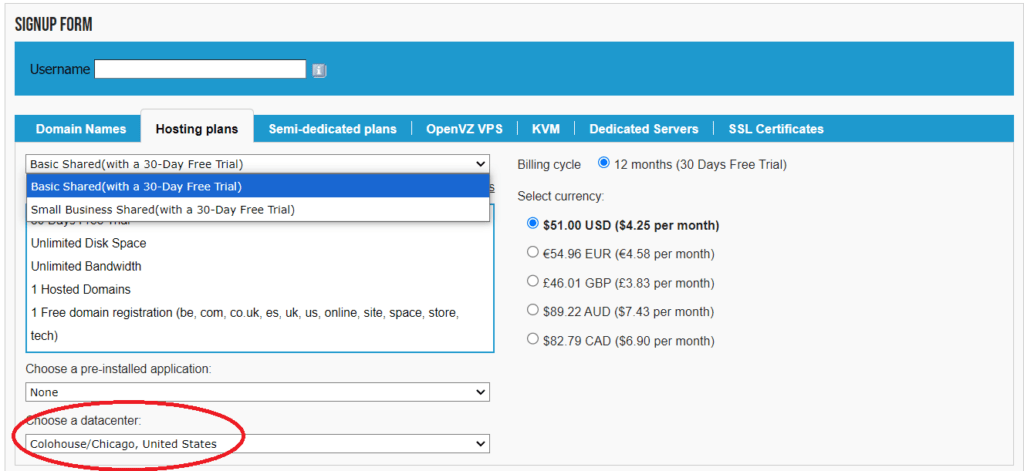
While 515Hosting is based in central Iowa, we offer server locations across the globe.
Please note, once you choose a server location, your account will be tied to that location and you will need to open a new account with a new username to select a new location. It’s important to choose your server location based upon where you believe visitors to your web site will primarily be visiting from.
Must like a road, data exists of physical molecules that must travel distances to deliver or receive information. The greater the distance the data must travel, the slower it takes for the data to be transferred. So visiting a website that is hosted on an east coast server from the west coast will take longer than if you were visiting from a closer location. Similarly, you should choose a data center in the UK if your customers are from that region even if you live in the US.
Step 5
Request Or Provide your Domain
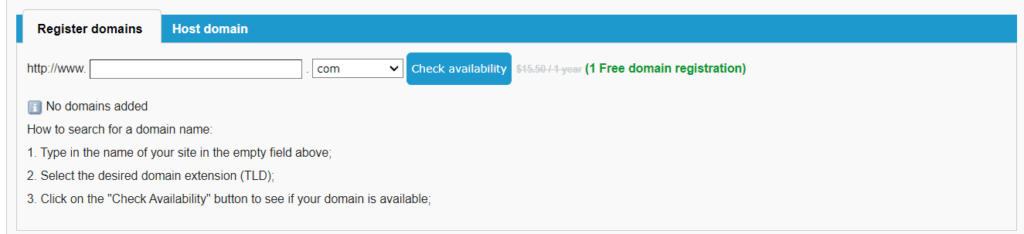
Each web hosting plan is associated with one or several domain names.
Many of our hosting plans include a free domain; however, you’re free to use domain names you already own even if they are registered with another provider. If you don’t already have a domain, simply type in your preferred domain name and select Check Availability.
If you would like to use a domain name located at another provider, you’ll want to click the Host Domain tab and then provide the domain name. You’ll be provided with Name Servers to input at your registrar that will point the domain to the 515Hosting server location.
Step 6
Provide Your Account Information

For both billing and ownership purposes, you’ll need to include your contact owner information under Account Owner Details.
Step 7
Create Account and Choose a Password
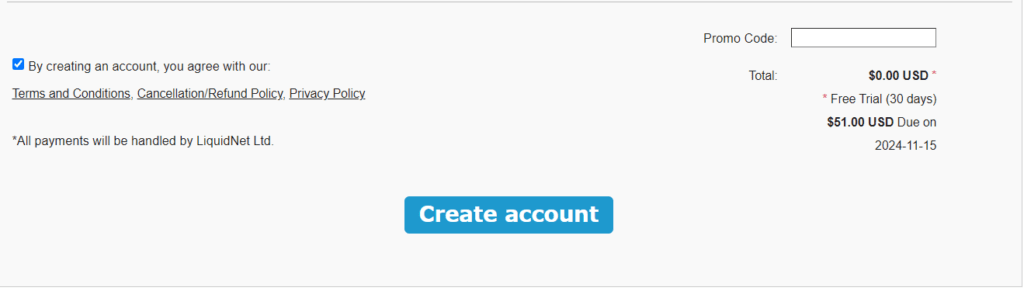
Now that you’ve selected all your account features, all you need to do is accept the Terms and Conditions via the check box and click Create Account.
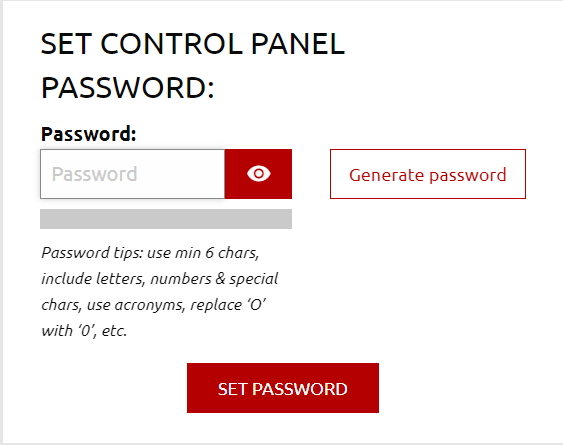
This will bring you to the password request page. Type in the password you’d like to use for your account and Set Password.
Your account will now be created. You will be requested to verify for you email address and provide payment in order to keep the plan active.
That’s it! You now have a web hosting plan providing you with server space for websites, emails, and more.